Monday 27 February 2017

Little gardener

Hello lovely people,

I am enjoying my week off immensely even though I haven't actually done any crafting!

So, my card today is not a brand new one, but one I made a few weeks ago for a work colleague to give to her husband for a special birthday.

Fortunately the image is so large and detailed that I didn't have to worry about filling the gaps on the card other than adding the name and age, but I think the fence detail works really well.

60th birthday card with gardening boy (image from LOTV)

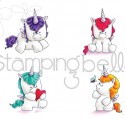
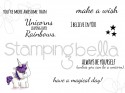
I was making this card in a bit of a rush so I didn't write down my Copic colours but I can tell you I had a lot of fun with the colouring as it's such a sweet image.

I've used the digi image for my card but you can also find it in rubber if you prefer.

60th birthday card with gardening boy (image from LOTV)

I hope you are all having a good week whatever you are doing.

Thanks for visiting and I really appreciate any comments that you leave,


Copic colours;
Nope, didn't write them down :-(

Lovely things I've used;
The Gardener - LOTV
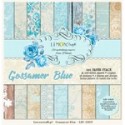
Various - Maja Design
Lovely fence - Magnolia Doohickeys
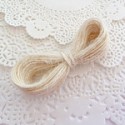
Ivory button twine - The Ribbon Girl
Numbers / letters from stash

Friday 24 February 2017

Flowers for a friend

Hello lovely people,

It's a doubly exciting Friday today as I have next week off work and I am sharing a card that I am really really pleased with, using some gorgeous new stash :-)

This is my Dies to Die For DT card this week so as usual you can find all the product links at the end of my post.

Kraft card for a friend using My Favorite Things Fancy flowers stamps and dies

These floral stamps and dies were a big hit with quite a few of the DtDF DT and I have to say I was smitten too!  I tried stamping them in different colour inks on different colours of card and colouring with different mediums, and all versions looked lovely!

I had to pick just one though for my first card and decided to go with white heat embossing on Kraft with Copic colouring.

Kraft card for a friend using My Favorite Things Fancy flowers stamps and dies

I was delighted when I found the perfect matching papers to use with the Kraft flowers and then even more so when I realised my new word dies would look lovely on here...it's fab when a card just comes together so nicely!

As you can see I got a little dimension in here too by layering some of the flowers on different heights of foam pads and stacking up 3 of each of the letters.

Kraft card for a friend using My Favorite Things Fancy flowers stamps and dies


If I've tempted you with any of the lovely supplies I've used then you can go straight to the individual products via the thumbnails at the end of my post or just pop over to Dies to Die For and have a little browse around!

Thanks for visiting and I really appreciate any comments that you leave,


Copic colours;
Pink: R81/83/85
Aqua: BG11/13/15

Lovely things I've used;

Tuesday 21 February 2017

LOTV wedding sentiment trio

Hello lovely people,

I'm here with a DT post for LOTV today and it's another sneak peek of one of the new trio sets coming out on 28th February.

In what I think is a first for me, I've made a 3 card matching set, using one of the sentiments on each.

I am going to show you all of them at once though because it saves time on writing blog posts and that way I  won't bore you with lots of similar posts...or keep you in suspense!

Wedding card using wedding trio sentiment by LOTV

I contemplated adding flowers but was really liking the clean modern feel to these so settled on just a few die cut hearts and some twine, plus a little sparkle pen on the hearts on the image.

Wedding card using wedding trio sentiment by LOTV

I really love the elegance of these sentiments and they are absolutely perfect for a focal point when you don't really want to do a lot of colouring...oh yes, I did actually say that!

Wedding card using wedding trio sentiment by LOTV

I was pretty happy with all the designs but I'd love to know if you have a favourite...it will be interesting to see if it's the same as my fave!

Thanks for visiting and I really appreciate any comments that you leave,


Lovely things I used;
Dies: Hearts from various MFT die sets, Tonic scalloped circles, Go Kreate large frames frilly #10, Spellbinders curved borders set 2

Sunday 19 February 2017

Little mouse with big bouquet

Hello lovely people,

I hope you are all having a good weekend whatever you are up to :-)

I really enjoyed my day off with Dr. Hubby on Friday; we had our coffee date and shared a piece of gorgeous banana cake then finished up by watching a film in the evening :-)

Yesterday was a day of crafting but was one of those where I struggled to get the ideas out of my head and into reality so I didn't achieve as much as I intended...I shall try harder today - lol!

Today is also the start of a new 'Use any image' challenge over on The Ribbon Girl blog, so you can enter with any type of project as long as you include an image.
There are loads of fab prizes up for grabs too :-)

Floral aqua Mothers Day card featuring mouse with flower bouquet (image by LOTV)

This is another of the recent releases from Lili of the Valley and oh gosh, it's just so adorable!  It's a lovely image to colour and I know pink will always be my first love, but aqua comes a close second I think.

I had fun adding little dots of green around the flowers then added some pearl drops just for good measure!

Floral aqua Mothers Day card featuring mouse with flower bouquet (image by LOTV)

I can't recommend these papers highly enough because they are such soft, pretty colours and designs.  Topped off with all those beautiful flowers, I have to say I am really this loving this finished card :-)

Floral aqua Mothers Day card featuring mouse with flower bouquet (image by LOTV)

If you find yourself tempted by any of the pretty supplies I've used then you can go straight to the individual products via the thumbnails at the end of my post or just pop over to The Ribbon Girl and have a little browse around!

Thanks for visiting and I really appreciate any comments that you leave,


Copic colours;
Mouse body: E41/42/43/44
Mouse tummy: YR30/E41/42
Mouse feet / tail: R000/01
Flowers / butterfly: BG10/11/45/49
Leaves / grass: G40/43/85
Ladybird: R56/39

Lovely things I've used;


Other card ingredients;
Butterfly set - Impression Obsession
Bloomers greenery - Taylored Expressions
Mini messages and mini tags - Mama Elephant
Nuvo crystal drops in Ivory seashell
1mm ivory pearls from stash

Friday 17 February 2017

Edna takes a nap

Hello lovely people,

I intend to spend some quality time with Dr. Hubby on my day off today, so am just quickly popping in with my Dies to Die For DT card.

My last few DtDF cards have been pretty CAS but I felt that Edna deserved something a little fancier!

These papers are truly gorgeous; it's a real treat when you find a pad where you can see yourself using every single design :-)

That's actually why this card didn't end up properly fancy with flowers etc. because I couldn't bear to cover the gorgeous papers - lol!

Clean layered card with fairy in teacup (image from Stamping Bella)

I loved using my Inktense pencils for this card but am also quite excited to colour Edna with Copics too, just for comparison.

I planned for the teacup to be white, but wanted to keep it really vintage looking, so tried out a very pale shade of brown rather than grey and I think it really worked :-)

Clean layered card with fairy in teacup (image from Stamping Bella)

You wouldn't believe how long I faffed around trying to find the perfect sentiment for this card...and then I ended up using one of my most-used sentiment sets...ho hum, I am so predictable!

I also made some tiny fishtail banners because I wanted to make use of the even the tiny scraps of pretty papers and they added a cute detail since I wasn't using any other embellishments.

Clean layered card with fairy in teacup (image from Stamping Bella)

If I've tempted you with any of the lovely supplies I've used then you can go straight to the individual products via the thumbnails at the end of my post or just pop over to Dies to Die For and have a little browse around!

Thanks for visiting and I really appreciate any comments that you leave,


Inktense colours;
Skin: Baked earth, Madder brown, Saddle brown
Hair: Tan, Willow, Oak
Feather boa / flowers: Crimson
Leaves: Leaf green
Wings / tag: Mallard green
Teacup: Sepia ink
Ground: Ink black

Lovely things I've used;

Other card ingredients;
Filigree corner - La La Land

Thursday 16 February 2017

Magical unicorn

Hello lovely people,

Did you all have a lovely Valentine's Day?

Dr. Hubby is working away for a few days this week including Valentine's Day and to be honest, we don't really do cards/presents for each other anyway.

He's back tomorrow evening and I have Friday off work so we can enjoy a long weekend together.  I'm really looking forward to that, especially as it might even include going for a little coffee and cake date ;-)


Ok, down to business and we have a new challenge for you at In The Pink and our theme this time is...
DIES +/or PUNCHES
Don't forget we want to see more pink than any other colour!

Our sponsor this time is the super fabulous Dies to Die For with a HUGE prize of a £15 voucher!
I knew I had to have these unicorns the moment I set eyes on them and of course the first one I did just *had* to be pink!

Cute pink CAS card with unicorn (image by Stamping Bella)


I am in utter amazement that for once the sparkle I added to the wings and horn is showing nicely in the photo!

Cute pink CAS card with unicorn (image by Stamping Bella)

I don't often use punches but I can't imagine crafting without my huge collection of dies!

The frame plus corners idea is something you're going to see again very soon...I guess I really liked the way it turned out - lol!

Cute pink CAS card with unicorn (image by Stamping Bella)

If you haven't already done so then do pop over to In The Pink and check out the gorgeous creations from the rest of the Pink Ladies.

If you love any of the products I used you can find the links in the thumnail pics at the end of my post or you may just wish to pop over for a little browse at Dies to Die For ;-)

Thanks for visiting and I really appreciate any comments that you leave,


Copic colours;
Unicorn: W00/T0/T1 (+ blender)
Hair: R83/RV11/RV10
Horn / wings: BG70/10

Lovely things I've used;


Other card ingredients;
Star flourish die set - Xcut
Crystal Glamour Dust

Friday 10 February 2017

I like how you roll

Hello lovely people,

Happy Friday to you all!

I have a Dies to Die For DT card for you today.

I may have already mentioned that I have the extremely nice problem of having sooooo many new MFT goodies that I hardly know what to use next!

My faves are always the cute critters though, so I decided on a hedgehog for this card, and it might be the speediest card I've ever made as it just all fell into place really quickly.

Cute CAS card with hedgehog (image from My Favourite Things)

I had a few ideas about how to colour the hedgehog but settled on a flicking type of colouring to try to capture the spikiness and I think it worked ok.

I could have stamped him direct onto the white circle but hey, I have the dies so I am going to use them!  It's nice to add a little dimension by popping him on foam pads too.

Cute CAS card with hedgehog (image from My Favourite Things)

If I've tempted you with any of the lovely supplies I've used then you can go straight to the individual products via the thumbnails at the end of my post or just pop over to Dies to Die For and have a little browse around!

FYI: there's a brand new MFT release available, but I take no responsibility for the temptation you may feel if you go and take a peek - lol!
I may already have given in to temptation myself ;-)

Thanks for visiting and I really appreciate any comments that you leave,


Copic colours;
Hedgehog bristles:
Hedgehog tummy / feet / ears: E40/41/42/43

Lovely things I've used;