Sunday 30 November 2014

Tilda in red

Hello lovely people,

I hope you all had a lovely weekend.  I certainly did although it involved more drinking and dancing with friends than crafting!

I said I had lots of cards to share with you and it will be no surprise that a lot of them are Christmas cards!
This one is using the absolutely stunning new DP collction from Maja Design; I think the red/grey/white colour scheme is so elegant; I have used mainly the white and pale grey papers here.


Yes, that is a new Tilda!  I managed to keep to my resolution of just buying one stamp from the latest collection and this was a stand out favourite for me.


I opted for something a little different to my usual 3D paper flowers to embellish and cut these poinsettias with my Cricut from the lovely red DP.


Card recipe;
Image: Christmas Candle Tilda, from Waiting for Christmas collection
DP: A gift for you - Maja Design (available from Live and Love Crafts)
Dies: Anja's vintage swirls - Marianne Design
Sentiment: cut from DP, plus free alphabet stamps for names

Copic colours;
Skin: E000/00/21/11/04 & R20
Hair: E50/43/44
Coat - hat: R27/46/39/89
Fur on hat: W00/0/1/2
Glove / boots: W3/4/5/6
Candle: YR30/31 & Y21/23/38
Foliage: YG93/95/97 & R46/39
Ground: W00/0/1/2/3/4

I hope you are all starting to feel festive - has anyone got their tree up yet?!


Challenges I am playing along with;
1. Marvellous Magnolia (anything goes Christmas)
2.  Sweet Magnolia (use a die cut)
3.  Tilda's Town (it's winter)
4.   The Ribbon Girl (Magnolia only - Christmas)
5.  As You Like It (fave Christmas style - I tend to go for a traditional feel as it suits the images I like to use but do enjoy using non-traditional colours to give it my own twist)
6.  Simon Says Stamp (anything goes)

Thursday 27 November 2014

Finishing touches

Hello lovely people,

I seem to have developed a thing recently for having several cards on the go at once.  It was getting a bit silly when I had 7, yes 7, half finished cards on my desk... and I was running out of space to craft in!
So, I have finished 5 of the 7 cards and consequently will have lots to share with you over the next few weeks :-)

First up is my card for our new challenge at In The Pink and our theme this time is...

DIE CUTS AND/OR PUNCHES

I have made a buckle card and if you want more details of how to make one of these, check out my tutorial here.
The die cut swirl I have used is a firm favourite of mine especially as you can cut it up to fit where you want it and create slightly different shapes.


The 'buckle' slides out from under the image panel like so...


The inside is decorated both to look pretty and to hide the buckle mechanism.


I used my fave little bear, sweet James from LOTV, and I'm sorry to say this rubber stamp has now been discontinued :-(


The fishtails for the sentiment were cut by hand and I used foam pads to add some dimension to them.


Card recipe;
DP: Vintage frost basics - Maja Design(available from Live and Love Crafts)
Dies:Leaf and swirl - Magnolia Doohickey
Tag: Christmas sentiment tags - LOTV
Snowflake charm: Snowflake 1 charm - The Ribbon Girl

Copic colours;
Fur: not entirely sure as I coloured his fur a while ago but I usually use E41/42/43 and maybe E44
Hat / scarf: RV91/93/95
Ground / fur on hat: W00/0/1/2

If you haven't already done so then do pop over to In The Pink and check out the gorgeous creations from the rest of the Pink Ladies.

Thanks for visiting and I really appreciate any comments that you leave,


Challenges I am entering;
1.  LOTV (Merry Christmas)
2.  Bunny Zoe's Crafts (snow)
3.  A Creative Romance (something old - this is one of my oldest  LOTV stamps but comes out to play every year!)

Tuesday 25 November 2014

Jolly holly

Hello lovely people,

Don't fall over in shock that I am posting; I'm here, I'm ok and I have a card to share!  But then of course, it's time for a new challenge at Top Tip Tuesday and our theme is...

BUTTONS AND/OR BOWS

I had this idea in my head for a little CAS card and what do you know, it actually turned out like I pictured!
I do love Kraft, white and red for Christmas :-)


And since it was so simple, I made a few more, each with a different sentiment on the tag.  I made 6 in total but here's a selection of 3 of them;


Card recipe;
Tags: Christmas sentiment tags - LOTV
Dies: Holly vine - Memory box

I hope you will pop over to Top Tip Tuesday and check out the fabulous creations from the rest of the team.

Thanks for visiting and I really appreciate any comments that you leave,


Challenges I am playing along with;
1.  Winter Wonderland (let's get sentimental)
2.  A Gem of a Challenge (Kraft + 1 other colour - I used red)

Thursday 13 November 2014

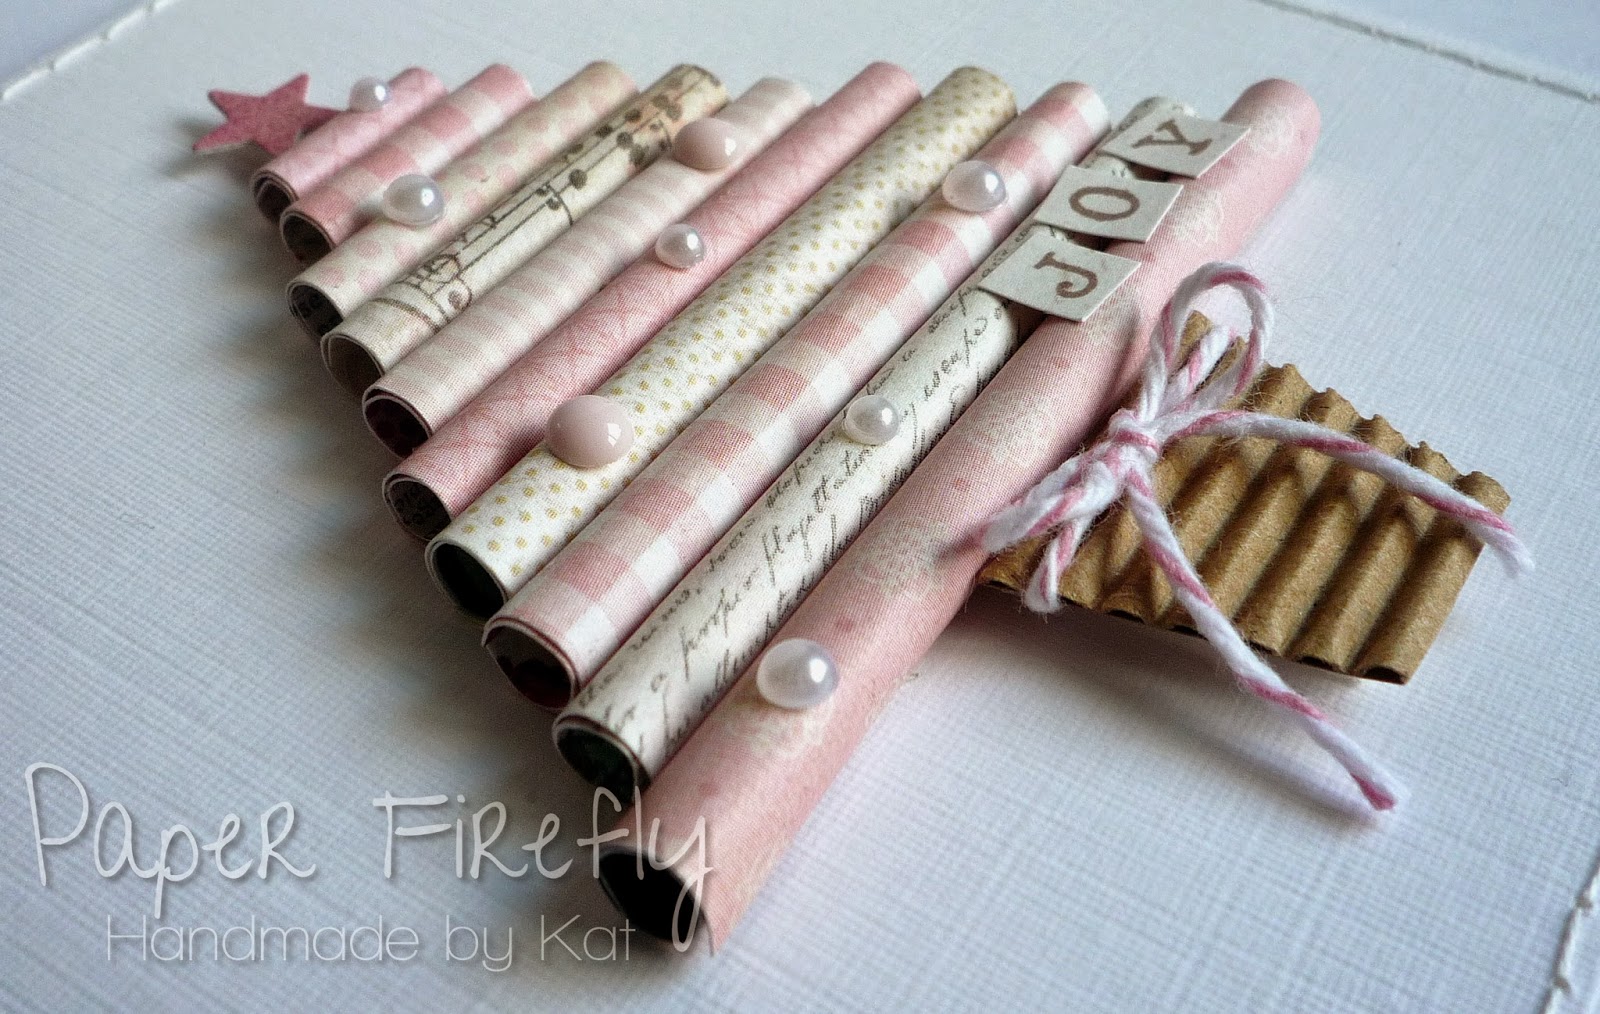
KISSmas tree

Hello lovely people,

It's time for a new challenge at In The Pink and our theme this month is...

KISS
(that's Keep It Sweet & Simple!)

I really haven't been making many cards lately that could be considered KISS although it is a style I love.  So, I did something completely different for me and used up lots of scraps of DP as well!


I rolled each paper strip quite tightly so the tree is quite sturdy and popped the star and pot on foam pads then sprinkled on a few pearls and enamel dots.
The teeny letters are from a stamp set that came free with a magazine and they have come in very handy a few times now!


Card recipe;
DP: Lost & Found - Madison Avenue - MME
Bakers twine: The Ribbon Girl
Corrugated card/pearls/enamel dots: from stash

If you haven't already done so then do pop over to In The Pink and check out the gorgeous creations from the rest of the Pink Ladies.

Thanks for visiting and I really appreciate any comments that you leave,


Challenges I am entering;

Tuesday 11 November 2014

Champagne and cake

Hello lovely people,

It's time for a new challenge at Top Tip Tuesday and our theme this time is...

3 OR MORE PAPERS

We are sponsored this time by Stamp and Create with a $20 voucher :-)


I do love to layer up my papers although it's a little trickier when you have a really big image, like I did here, to make sure you don't cover all those gorgeous layers up!


I think this might be my fave Stamping Bella image; I just wish I looked as glamorous as this!
I tried to make the bottle look like a champagne bottle... mmmm, lovely bubbly :-)


Card recipe;
DP: Vintage autumn basics - Maja Design(available from Live and Love Crafts)
Lace/twine: The Ribbon Girl
Sentiment: mini clear set - Kaisercraft

Copic colours;
to follow

I hope you will pop over to Top Tip Tuesday and check out the fabulous creations and some brilliant tips from the rest of the team PLUS a great guest tutorial :-)

Thanks for visiting and I really appreciate any comments that you leave,


Challenges I am playing along with;
1.  Cute Card Thursday (stripes)
2.  Fab 'n' Funky (3 different embellishments - flowers, lace and twine...and a button... is 4 ok?!)

Thursday 6 November 2014

Rosette tags

Hello lovely people,

Here we go again with a new challenge at Crafty Little Fairies and our theme this month is...

NOT A SQUARE

I have been enjoying making shaped cards recently so that would have been a good option here but I was suddenly inspired to make some tags or maybe they could be used as decorations?!


I made the rosettes by using a punch along a 12" strip of paper and folding by hand at regular intervals.  If you like your rosettes with more folds then you could join 2 pieces of paper together.


I tied a little jingle bell at the top with twine, which made them instantly unacceptable to Dr. Hubby, but I rather like the noise they make!


Tag recipe;
DP: Silent night - Pion Design (available from Live and Love Crafts)
Bells: Silver jingle bells - The Ribbon Girl
Dies: Swirl flower - Marianne Design

We have FIVE prizes up for grabs this month so do pop over to Crafty Little Fairies to see what you could win and check out the fabulous creations from the rest of the fairies.

Thanks for visiting and I really appreciate any comments that you leave,

Tuesday 4 November 2014

Double take

Hello lovely people,

I went to a wedding a couple of weeks ago so of course, I have a wedding card to show you!  Actually, make that TWO wedding cards!
I was preparing the card when my sister-in-law asked if I could make a card for a wedding card she was attending so to make my life easy I did 2 the same but in different colours :-)

I was going for a shabby chic style with distressed and inked edges, and lots of flowers and pearls.  I adore how they came out and to be honest, I couldn't even choose which is my fave colourway!

Here's the one I made for my sister-in-law;


My new flowers came in handy for this as I had lots of lovely new purple/lilac ones to play with :-)  I have scattered a few pearls around them too.


This layered bow has to be my favourite way to finish a card off right now!  And you can see the little cluster of pearls peeking out from the rolled over corner.


I won't bore you with close ups of the other version of the card and will just show you the overview so you can see the different colour scheme.


Card recipe;
DP: Vintage spring basics - Maja Designs (available from Live and Love Crafts)
Seam binding / twine: The Ribbon Girl
Dies: leaf and swirl - Magnolia Doohickey

So, which is your favourite?!

Thanks for visiting and I really appreciate any comments that you leave,


Challenges I am playing along with;
1.  As You Like It (cute or elegant?  I really like both but I was going for elegant here as it allowed me to use lots of pretty papers and embellishments)
2.  Papertake Weekly (anything goes +/- sparkle)